Hardscape for Planted Tanks: How to Style Wood and Rocks Like a Pro
If you’ve ever looked at a planted tank and thought, “How does that look like that good?”, the answer almost never lies in the plants. It lies in the hardscape, the arrangement of rocks and wood that forms the tank’s framework. It’s the first thing you set up, the element that defines the style of everything else, and the hardest to correct once the substrate and plants are in place. This hardscape guide for planted tanks takes you from planning to installation, with tips to help you avoid the classic mistakes made by beginners.
What is Hardscape?
Hardscape refers to the solid elements of the tank, such as rocks and wood, as opposed to softscape, which consists of plants. The order of assembly is fixed: first the planning, then the hardscape, followed by the substrate, the plants, and finally the water. There’s a practical reason for this. Moving a rock in an already planted tank means pulling up roots, clouding the water, and wasting hours of work. In addition, the hardscape creates hiding places and territories for the fish, which helps reduce their stress.
Plan ahead before getting your hands wet
Before you place a single rock in the tank, do a dry run. Mark out a rectangle on a table or the floor using a piece of cardboard that matches the tank’s dimensions, and try out different positions for each rock. Take a photo of each layout and compare them. This step may seem like a waste of time, but it will save you a lot of backache, because moving a rock out of the tank takes seconds, but inside the tank, with substrate and water, will take you an entire afternoon.
The Rule of Thirds and the Focal Point
The rule of thirds comes from photography and works the same way in a tank. Imagine the frame divided into three columns and three rows, like a tic-tac-toe board. The four intersections of these lines are the points where the eye feels comfortable, and you should place the focal point near one of them, rather than in the center. A centered focal point looks static, symmetrical, and lifeless. An off-center focal point creates movement and conveys a sense of naturalness.
The focal point is the element that catches the eye first: the most imposing rock, the most dramatic tree trunk, or a group of stones forming a small hill. The rest of the hardscape exists to support this element and draw the eye toward it. A branch or tree trunk pointing toward the focal point, or a row of stones sloping diagonally toward it, are simple ways to achieve this.
A few handy rules can help refine the composition:
Use odd numbers. Three or five stones work better than two or four, because odd-numbered groups look natural and less contrived.
Vary the sizes. One dominant piece, two or three medium-sized ones, and a few small ones to complement them add rhythm to the arrangement.
Align the rock veins. If the stones have visible veins or layers, orient them in the same direction so they look like fragments of the same mountain.
Leave empty space. The empty space, known as negative space, gives the eye a rest and highlights what is filled. It’s not waste; it’s composition.
Selection of Materials
The three most popular materials in the hobby are Dragon Stone, Seiryu Stone, and Spiderwood. Each has its own unique appearance, a different effect in water, and a type of landscape in which it really shines.
| Material | Appearance | Effect on water | Ideal for | Care |
| Dragon Stone | Shades of light brown to gray, with grooves and holes | Generally inert | Landscapes with an aged, textured look and moss | Fragile, may break and have sharp edges |
| Seiryu Stone | Gray with white veins | Increases hardness and pH | Mountain landscapes, Iwagumi style | Avoid using with soft-water species |
| Spiderwood | Thin, branched twigs | Releases tannins (yellowish water) | Trunks, roots, and “trees” | Floats at first; requires preparation |
Dragon Stone
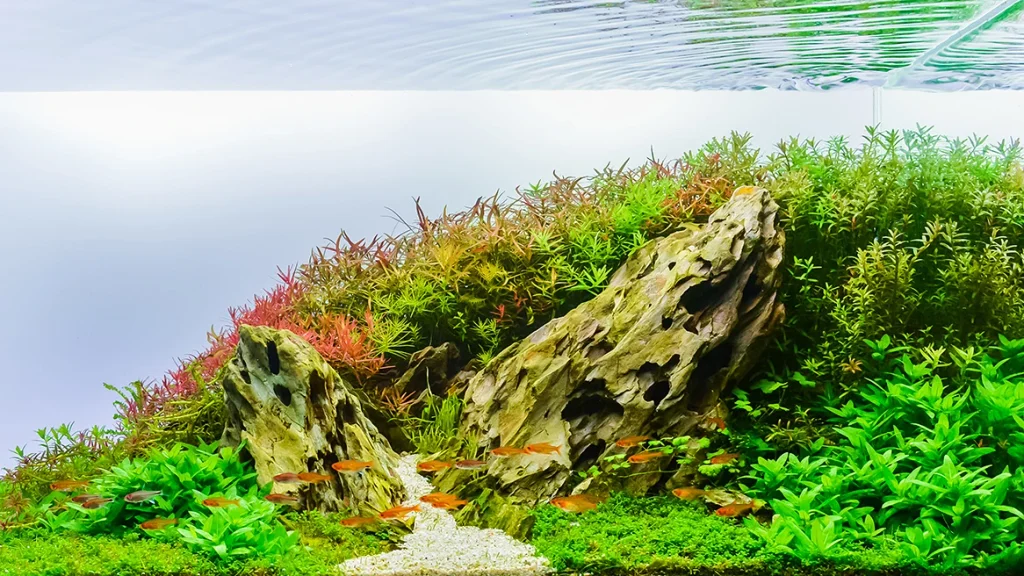
It’s the best choice for beginners. Its surface, full of grooves and holes, gives it the look of ancient rock, and its warm hue, usually different types of brown, contrasts beautifully with the green of the plants. Because it’s porous and rough, moss and Anubias cling to it easily. As a rule, it doesn’t alter water parameters, making it safe for almost all tanks. The downside is that it’s fragile: it breaks easily and the edges can be sharp, so handle it with care.
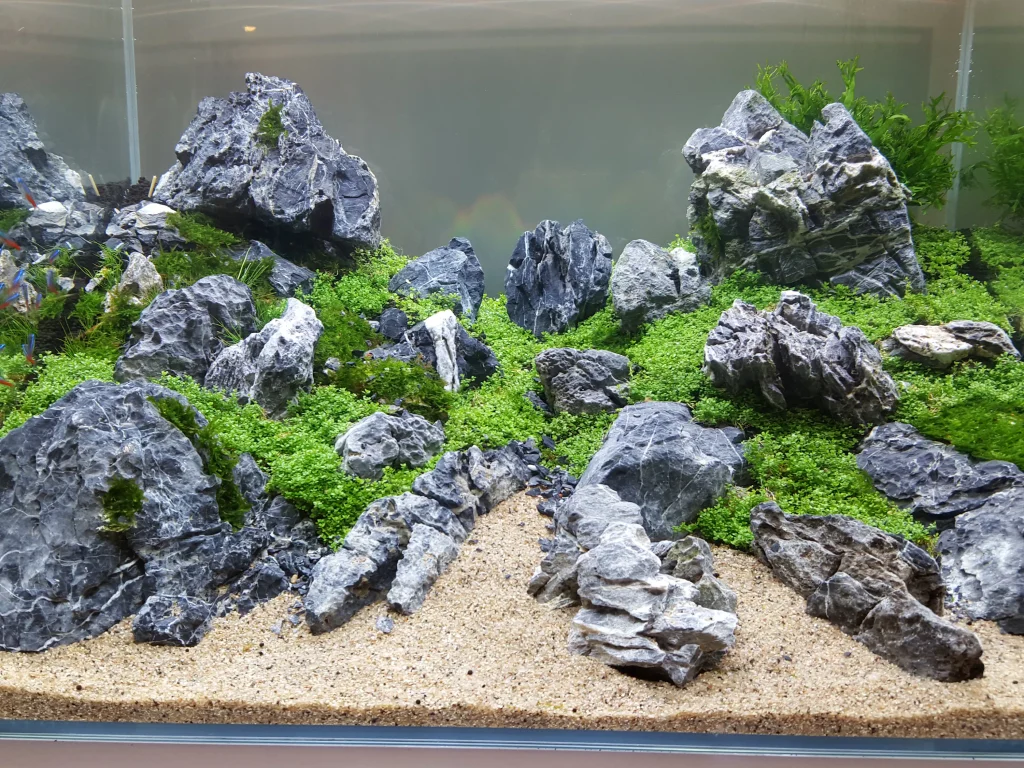
Seiryu Stone
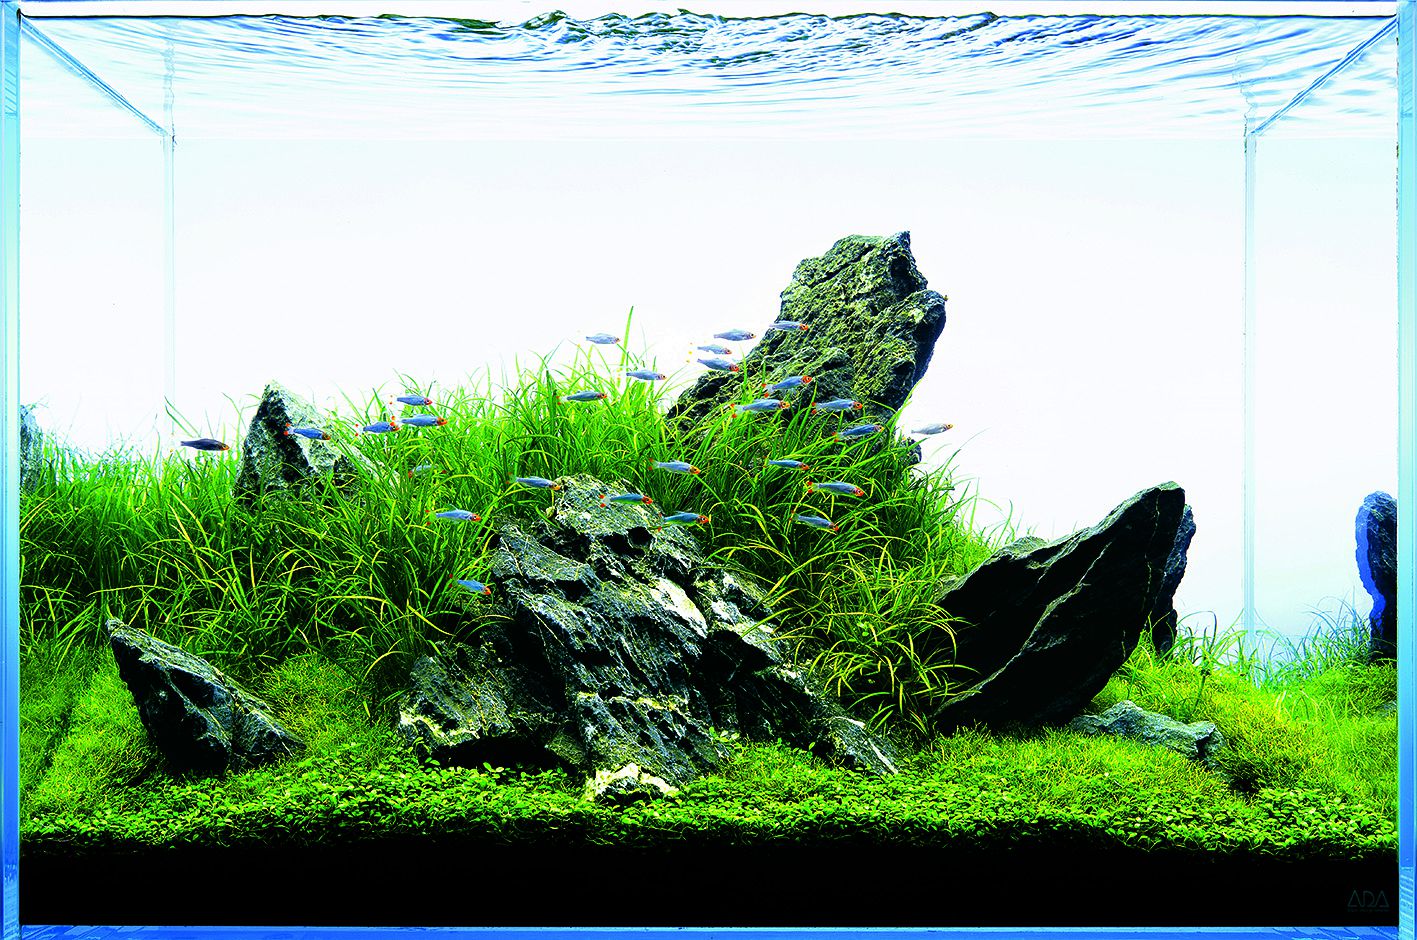
It’s the queen of mountain landscapes. The gray with white veins creates rocks full of character, and a single Seiryu in the right spot is worth an entire pond. But there’s one technical detail you can’t ignore: this stone contains carbonates, which gradually dissolve and raise the pH and hardness of the water. To test it, drip a few drops of vinegar onto the rock, if it foams, it contains carbonates. This increase doesn’t affect fish that prefer hard water, such as Platies and Mollies, but it’s a bad idea for soft-water species, such as Cardinal Tetras and Rams.
Spiderwood
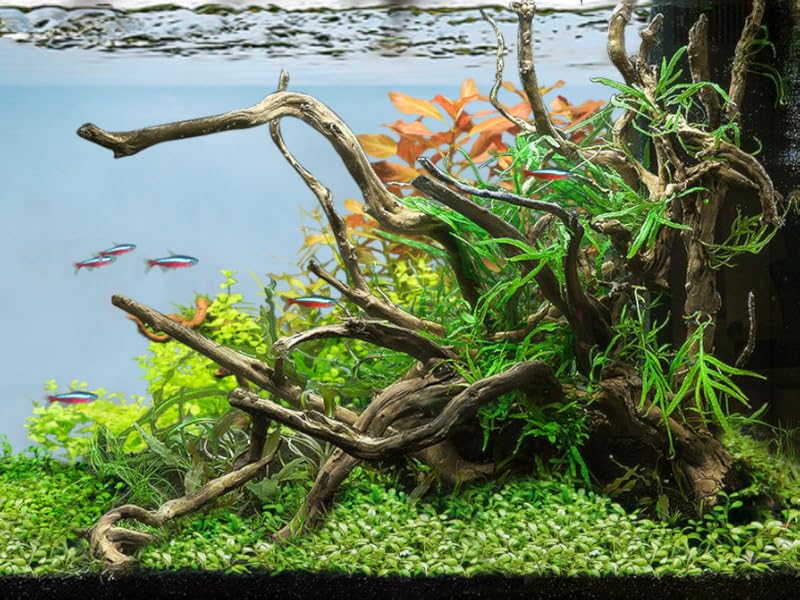
It is the ideal wood for creating “trees” and roots, thanks to its thin, branched twigs that spread out in various directions. It is lightweight, which makes it easy to assemble, but this lightness presents a problem: it floats. It releases tannins, which give the water a yellowish tint, harmless to fish and even beneficial to some species. If that color in the water bothers you, the article on how to achieve crystal-clear water explains how to fix it. Another interesting fact: in the first few weeks, a whitish film may appear on the wood. It’s harmless, goes away on its own, and fish like ancistrus and otocinclus love to nibble on it.
A golden rule for any choice: use only one type of rock. Mixing Dragon Stone with Seiryu and some other random stone creates a rock garden that looks like a souvenir shop rather than a natural landscape. Repeating the same material is what gives the whole arrangement its coherence.
Preparation of the parts
Before setting up your tank, clean everything. Wash the rocks under running water with a brush (without soap or detergent), and make sure they don’t have any sharp edges that could injure fish with delicate fins, such as bettas and guppies. Perform the vinegar test on any rock of questionable origin.
For Spiderwood, scrub the wood and leave it in a bucket of boiling water for one to two hours, or let it soak in water for a few weeks. This helps it sink, releases some of the tannins, and eliminates any pests. Avoid collecting rocks and wood in the wild unless you know what they are: they may contain carbonates, pollutants, or parasites.
How to Secure Rocks and Wood so they don’t float away or fall
Rocks -> Stability starts at the bottom. Place the larger rocks directly on the bottom glass, with a thin sheet of foam underneath to distribute the weight and protect the glass from pressure points. Only then should you add the substrate around them. Never stack rocks on loose substrate, because burrowing fish, such as corydoras, will eventually undermine the base, and the structure could collapse. Bury about one-third of each rock, this stabilizes it and makes it look like part of the terrain, and build from the bottom up: heavy pieces at the bottom, light ones on top, and with as much space as possible between the stones. Before adding water, gently push each piece to make sure it doesn’t move.
Wood pieces -> The enemy is floating. The first line of defense is the preparation method already described: boil or soak them until the wood sinks. If they still insist on floating, you can tie them to a rock or a slate tile with fishing line, bury part of them in the substrate with a rock on top, or glue them to a heavy base.
The gel glue and cotton trick -> Here’s a method that makes it easier to assemble complex structures. Instead of applying the gel glue directly between two pieces that don’t fit together perfectly, place a small amount of cotton in the contact area and apply the aquarium gel glue on top. The cotton acts as a framework that fills in gaps and adds volume to the bond, and the glue hardens it in a matter of seconds, forming a solid bridge between the pieces. With this method, you can attach logs to rocks or build a tall “mountain” out of several small stones, even when the surfaces are uneven.
To apply it correctly: dry the contact surfaces, position the piece in its final location, apply the cotton and the adhesive, hold the piece in place for a few seconds, and let the adhesive cure for the time specified by the manufacturer before submerging it. Use only as much cotton as necessary, because a thin layer cures better. A safety warning: Many gel adhesives heat up when curing in contact with cotton, so wear gloves and do not hold the pieces with your fingers while the adhesive sets.
And the best part comes next: the cotton and glue are visible at the joints, but it’s easy to hide everything. Attach some moss or an Anubia Nana to the joints, and in a few weeks the plants will cover the joints and anchor themselves to the structure with their own roots. The result is a hardscape that looks like a single, natural piece, with no traces of glue.
How to Create a Sense of Depth in the Tank
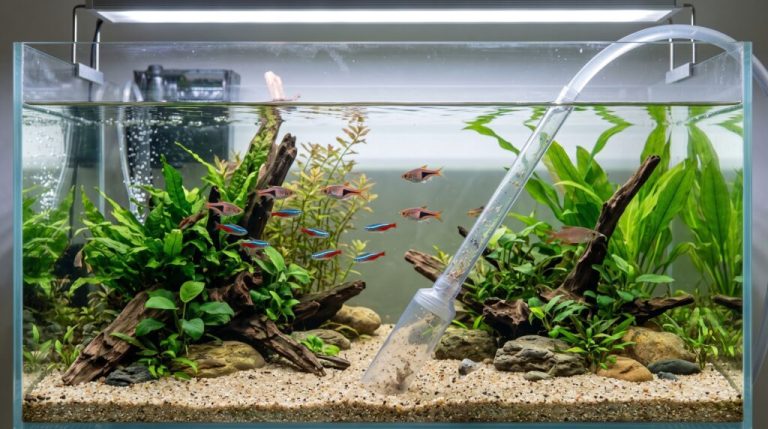
An aquarium is only a few dozen centimeters deep, but a well-designed aquascape makes it look as if it’s several meters deep. This illusion is created through perspective, and there are a few simple tricks for achieving it.
Tilt the substrate. Place more substrate in the back and less in the front, creating a gentle slope from the bottom to the front glass. This slope makes the background appear higher and farther away, and you can secure it with small rocks that act as a retaining wall.
Place the large pieces in the front and the small ones in the back. This technique is called forced perspective: rocks of the same style, but gradually smaller toward the back, trick the eye and make the tank appear deeper than it actually is.
Use narrow-leaved plants in the background and broad-leaved plants in the foreground. Fine textures appear farther away, and coarse textures appear closer. An Anubia Nana in the foreground and a narrow-leaved stem plant in the background, such as Limnophila sessiliflora, reinforce this effect.
Create a path that narrows toward the back. A sand trail that starts wide in the foreground and narrows in the distance is one of the most effective illusions of depth there is.
Organize the tank in layers. Think of the tank as having three planes: foreground, middle ground, and background, with open space between them. The space between the layers is what gives the scene depth and a sense of distance.
Darken the background. A black film on the back glass eliminates the distraction of the wall behind the tank and makes the colors of the plants and rocks stand out.
Common Mistakes to Avoid
Arrange everything in the center and symmetrically. This creates a static, artificial look. Shift the focal point and break the symmetry.
Mixing various types of rock and wood creates visual clutter. Choose one type of rock and one type of wood, and repeat them.
Ignoring the effect of rocks on the water. Seiryu increases hardness and pH, so make sure the species in your tank can tolerate this water before using it.
Forgetting to boil or secure the wood to rocks before planting. Discovering that the log floats once the plants are already in place is an avoidable headache.
Stacking rocks without a stable base. In addition to the risk of them collapsing, they can break the glass or injure the fish.
Leaving sharp edges within reach of fish with delicate fins. Sand them down or choose a different piece if necessary.
Overfilling the tank with hardscape. Plants need room to grow, and fish need room to swim. Less is more.
Frequently Asked Questions
Can I use rocks and logs from the garden or the beach?
It’s not advisable. They may contain carbonates, salt, pollutants, or parasites, and it’s hard to know what you’re putting in the tank. Use materials sold specifically for aquariums.
Will the wood turn the water yellow?
Yes, in most cases. This is due to tannins, which are harmless to fish. Boiling the wood, performing regular partial water changes, and using activated carbon in the filter will reduce the effect to the point where you won’t even notice it.
How many rocks should I use?
It depends on the size of the tank, but three or five pieces are usually a good starting point. One large one, a few medium-sized ones, and some small ones to fill in the gaps.
Do I need CO2 for the plants that hide the seams?
No. Anubias nana, Java Fern, and Christmas Moss grow without CO2 and are the ideal choices for hiding seams and glue.
Can I make changes to the hardscape after it’s been set up?
You can, but it’s a lot of work: it requires disturbing the substrate and the plants, and it will cloud the water. That’s why it’s worth investing time in the initial planning.
In short, the hardscape its almost the most important thing about a planted tank. Plan the layout using the rule of thirds, choose materials that work well together, secure the pieces firmly, and use perspective to create depth. With the gel glue and cotton trick, even the most ambitious structures are within your reach, and the plants will take care of hiding the rest.
If you’re interested in any of the products mentioned in this article, click below to explore them!
| ARKA Gel Glue | Dragon Stone | Seiryu Stone | Spiderwood |